Free Handyman Estimate Template: Customize It for Profit
Create accurate quotes with a free handyman estimate template. Learn how to customize it for profit, clear pricing, and a professional client experience.
By TradeworX
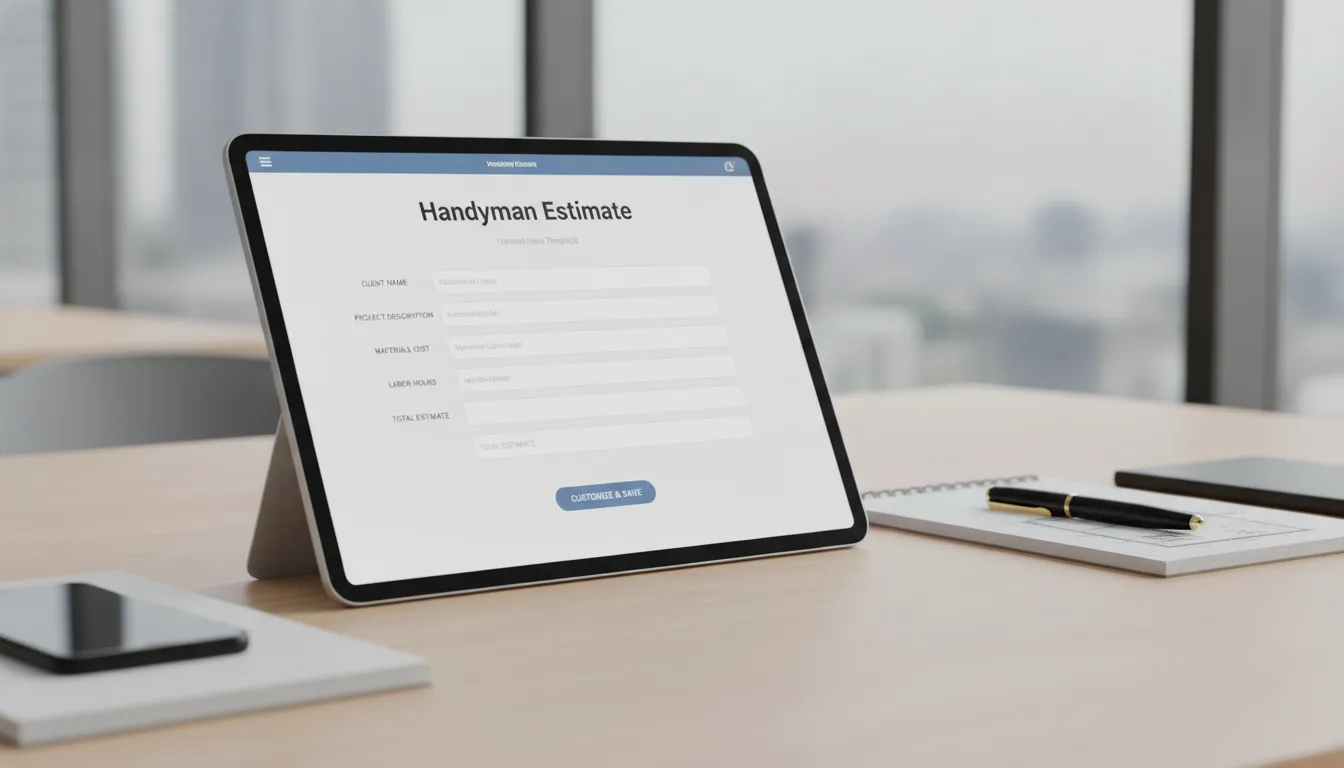
Many handyman business owners prepare estimates from scratch, switching between notes, receipts, spreadsheets, and memory. That process takes time and leaves plenty of room for missed costs. A free handyman estimate template can bring those details into one clear format. With the right fields, you can outline the work, list labor and materials, add markups and fees, explain exclusions, and show the customer how you reached the final price. A template will not replace good judgment, but it can support a more consistent process. Learn how to turn a basic document into a practical pricing tool for your business.
Key Takeaways
- Build estimates around the complete job: Account for labor, travel, setup, cleanup, materials, markups, overhead, taxes, permits, disposal, and other project costs before setting the final price.
- Make every estimate clear and specific: Describe the scope, assumptions, exclusions, payment terms, schedule, warranty, and change-order process so clients know exactly what they are approving.
- Use estimate data to improve your business: Compare projected and actual hours, costs, margins, and close rates, then update your pricing rules and systems to support consistent growth.
What Is a Free Handyman Estimate Template, and Why Use One?
A free handyman estimate template is a reusable document for outlining a project’s scope, pricing, schedule, and terms. Rather than starting from a blank page for every customer, you can enter the job details, adjust the pricing, and send a polished estimate that reflects your business.
A template also creates a repeatable pricing process. It prompts you to review labor, materials, travel, fees, taxes, payment terms, and possible risks before work begins. When you customize it around your services and pricing rules, it can help your team prepare estimates more consistently. TradeworX Consulting helps handyman business owners build practical systems for accurate pricing and sustainable growth through handyman business coaching and growth systems.
Compare estimates, quotes, and invoices
An estimate describes what a project is expected to cost before work begins. The total may change if the scope changes, concealed damage appears, or the customer requests additional work. Your terms should explain how long the estimate remains valid and when a price adjustment may apply.
A quote usually presents a more formal price for a clearly defined scope. Depending on your agreement and local requirements, it may carry different obligations than an estimate. Make sure your document clearly states whether the price is an estimate or a fixed quote.
An invoice has a different purpose. You send it after completing some or all of the work to request payment. A well-organized estimate makes invoicing easier because it already includes the customer’s information, approved line items, and payment terms. For a useful checklist of required estimate details, review this handyman estimate template guide from Bookipi.
Improve speed, accuracy, and consistency
A template saves time by keeping your business information, service categories, standard terms, and calculation fields in one place. For each new project, you only need to add details that change, such as labor hours, material quantities, site conditions, and additional fees.
This structure also reduces the chance of leaving out important information when you are preparing several estimates in a busy week. Every customer should receive the same core details and a document that looks professional, whether you prepare it from a laptop, phone, or office computer.
A spreadsheet or estimating platform can handle calculations more reliably than manual math. Contractor-focused tools can make complex estimates faster and more accurate, especially when projects include multiple labor tasks, materials, and fees.
Clarify the scope and final price
A clear estimate helps customers understand what they are paying for. Describe each task in plain language, list the expected materials, and separate labor from other charges. If the project covers several rooms or repair areas, identify each one instead of using a broad description such as “general handyman work.”
Include assumptions, exclusions, and possible extra charges in the template. For example, you might state that the price assumes accessible work areas, standard hardware, and no concealed damage behind a wall. You can also explain whether the customer must move furniture, provide access, or approve material selections.
These details reduce misunderstandings and give you a process for handling work outside the original scope. A granular estimate makes it easier for both you and the customer to see how the final price was determined, as Estimate Rocket explains.
Protect margins and profits
A professional estimate helps you price the entire job, not just the visible repair. Account for productive labor, travel, setup, surface protection, cleanup, disposal, materials, equipment, administrative time, and overhead. Small omissions can reduce the profit on one project, and repeated omissions can create a serious problem across dozens of jobs.
Your template should separate material markup from profit margin so you can review the numbers properly. It should also include fields for taxes, permits, deposits, change orders, and payment terms. These details help you identify the true cost of completing the work before you commit to a price.
Common estimating problems include inaccurate material quantities, labor miscalculations, missed indirect costs, and manual data-entry errors. Reviewing the estimating risks outlined by McCormick Systems can help you add practical checks to your process. A free template is a useful starting point, but it should support profitable pricing rather than simply make an estimate look complete.
What Should a Professional Free Handyman Estimate Template Include?
A free handyman estimate template should do more than display a price. It should show the client what you plan to do, how you calculated the cost, what could change, and what happens next. A complete estimate also gives you a repeatable process for pricing jobs, reviewing costs, and moving approved work into your schedule.
Use the template as a starting point, then customize it around your services, pricing rules, and operating costs. A polished document can still create problems if it leaves out travel time, material markups, payment terms, or hidden-condition disclaimers. Resources such as Bookipi’s handyman estimate template can help you identify the basic fields, but your final version should reflect how your business actually prices and delivers work.
Add business, client, and property details
Start with your business name, logo, phone number, email address, website, and service area. If applicable, include your contractor or business license number and proof of insurance. These details help clients confirm they are working with a legitimate professional and make it easy to contact you with questions.
Add the client’s name, billing address, phone number, and email address. Record the project address separately if it differs from the billing address. Include the property type and useful access details, such as gate codes, parking restrictions, tenant requirements, or occupied rooms.
If a property manager, landlord, or business is involved, include the company name and the person authorized to approve the work. Accurate details prevent scheduling mistakes and connect the estimate to the correct property, decision-maker, and job record.
Include the estimate number, issue date, and expiration date
Assign every estimate a unique number, such as EST-1048. A consistent numbering system makes it easier to locate the document, match an approved estimate to an invoice, and answer client questions later. Use the same estimate number in your scheduling and accounting records.
Add the issue date and an expiration date. A validity period gives you room to account for changes in supplier pricing, labor availability, fuel costs, or seasonal demand. Many businesses use a 15-, 30-, or 45-day period, depending on the project and the likelihood of price changes.
Explain what happens when the estimate expires. For example: “Pricing is valid for 30 days and may be updated after that date.” This wording gives the client useful context and prevents an old estimate from becoming an open-ended commitment. Bookipi’s estimate guidance also recommends including identifying dates and numbers for better recordkeeping.
Define the scope, assumptions, and exclusions
The scope should describe exactly what the client is paying you to complete. Identify the room, fixture, surface, or structure involved, and use plain language. “Remove the damaged bathroom vanity, install the client-provided replacement, reconnect existing plumbing, and test for leaks” is more useful than “bathroom repair.”
List assumptions that affect your price. You might assume the existing wall is structurally sound, shutoff valves work, materials are available, or the client will provide clear access. Then add exclusions, such as painting, drywall repair, permit fees, concealed damage, or electrical upgrades.
Clear scope language helps prevent disagreements about what the price includes. Handyman Startup’s estimating guide also emphasizes defining the work and accounting for conditions that could affect the final cost. If an unknown condition appears, state that additional work requires written approval before you proceed.
Itemize labor tasks, hours, rates, and totals
Break labor into individual tasks instead of using one vague labor charge. Common categories include site preparation, removal, installation, adjustments, testing, and cleanup. For each task, show the estimated hours, hourly rate, and line total.
If more than one technician will work on the project, show the crew size or list each role separately. A two-person crew working for three hours represents six labor hours, not three. This calculation gives the client a clearer picture of the work and helps you verify that the estimate matches your plan.
Include a labor subtotal before materials and other charges. Your rate should cover more than a technician’s wage. Account for payroll taxes, workers’ compensation, insurance, supervision, vehicle costs, tools, office time, and profit. If these expenses are missing, a full schedule can still produce disappointing financial results.
List materials, quantities, costs, markups, and totals
Create a separate materials section with the item description, quantity, unit cost, markup, and line total. Include ordinary supplies as well as visible finish materials. Fasteners, caulk, adhesive, protective coverings, replacement blades, and similar items can add up across several jobs.
If the client has not selected a product, use an allowance instead of guessing at an exact price. For example, you could include a $250 allowance for a vanity or light fixture. Explain whether the allowance covers the product only or also includes delivery and related installation materials.
A material markup can cover purchasing time, sourcing, delivery coordination, storage, warranty handling, and price changes. Keep material markup separate from your overall profit margin in your internal pricing process. This distinction helps you see whether the job covers direct costs and the overhead required to run your business.
Add taxes, trip charges, disposal fees, permits, and other costs
Your estimate should account for project costs that do not fit neatly into labor or materials. Depending on the job, these may include sales tax, service or trip charges, delivery, disposal, dump fees, permits, equipment rentals, parking, and subcontractor work.
Show each charge as its own line item whenever possible. A client is more likely to understand a disposal fee when the estimate explains that it covers loading, transport, and landfill charges. A separate trip charge also makes travel costs clearer than quietly adding them to an hourly labor line.
Check the tax, permit, and licensing rules that apply to your location and type of work. The IRS small-business tax resource offers general recordkeeping guidance, but state, county, and city agencies determine many local requirements. Do not assume a template’s default tax field matches your obligations.
Set the schedule, deposit, payment terms, and balance due
Tell the client when you expect to start, how long the work should take, and what could affect the schedule. Use an estimated start window when the date depends on material delivery, permit approval, weather, or another project. You can also state the client’s responsibilities, such as clearing the work area or arranging property access.
List the deposit amount, payment milestones, accepted payment methods, and balance due date. For a larger project, you may request a deposit at approval, a progress payment when materials arrive, and the remaining balance at substantial completion. For a smaller repair, payment may be due upon completion.
Be specific about late payments, cancellation charges, and returned-payment fees if you use them. Explain whether the deposit is refundable and how you will handle material purchases if the client cancels. Clear payment terms protect cash flow and give the client a practical understanding of their commitment before work begins.
Include change orders, warranty terms, approval, and signatures
Add a change-order process before the project begins. State that work outside the approved scope requires a written change order describing the added or reduced work, price adjustment, and schedule impact. Whenever possible, receive approval before performing extra work, except when immediate action is needed to protect people or property.
Your warranty section should explain what workmanship you cover, how long coverage lasts, and what it excludes. Common exclusions may include normal wear, client-supplied materials, misuse, manufacturer defects, and damage caused by another contractor. Make sure the wording matches your contracts and local requirements.
Finish with an approval section that includes the client’s name, signature, and date. Add a statement confirming approval of the scope, price, payment terms, and attached conditions. A signature does not replace a clear conversation, but it creates a written record and provides a clean handoff from estimating to scheduling.
Free Handyman Estimate Template: Copy-and-Customize Layout
A free handyman estimate template gives you a dependable starting point for every project. Instead of rebuilding an estimate from scratch, you can copy the layout, add your branding, update your pricing, and send a professional document in less time.
Your template should do more than display a final price. It should explain the work, show how you calculated the cost, identify what is not included, and outline what happens after approval. That clarity helps clients make decisions and gives you a written record of the agreed scope.
Use the layout below in Word, Google Docs, Excel, Google Sheets, or estimating software. The format matters less than the process. Every estimate should follow the same structure, while still allowing you to adjust the scope, rates, materials, and terms for each project. A consistent estimating process can also support the kind of repeatable systems offered through TradeworX Consulting’s handyman business coaching.
Add a branded header and project summary
Start with your business name, logo, phone number, email address, website, license details, insurance information, and service area. Make it easy for the client to identify your company and contact you with questions. A clean header also helps your estimate look established and professional.
Add the client’s name, phone number, email address, property address, and preferred contact method. Include an estimate number, issue date, and expiration date near the top of the page. These details help both you and the client locate the correct document when several estimates are in progress.
Give the project a specific title, such as “Kitchen Cabinet Repair” or “Rental Property Turnover Repairs.” Then write a short summary of the project objective. For example: “Repair damaged drywall in two bedrooms, replace hallway baseboard, and repaint affected areas.” This gives the client context before they review the itemized pricing. Bookipi’s handyman estimate template includes these core business, customer, date, and service fields.
Define the scope, assumptions, and exclusions
Describe the work in plain language and separate it into clear tasks. Avoid phrases such as “complete repairs” or “fix items as needed.” Instead, explain what you will remove, repair, install, prepare, test, paint, or clean. Specific descriptions make the estimate easier to review and reduce disagreements later.
Next, list the assumptions behind your price. These might include clear access to the work area, normal business-hour scheduling, available parking, usable existing wiring, or a sound surface beneath the repair. Then identify exclusions, such as hidden water damage, structural repairs, asbestos removal, permit fees, or painting outside the listed areas.
If an unknown condition could affect the price, explain how you will handle it. You might state that concealed damage will be photographed, discussed with the client, and priced through a written change order before additional work begins. Estimate Rocket recommends a detailed scope so clients can understand how the price was determined.
List labor hours, rates, and line totals
Break labor into individual tasks rather than using one broad labor charge. For example, list “Remove damaged trim,” “Prepare wall surface,” “Install replacement trim,” and “Caulk and touch up.” For each line, show the expected hours, hourly rate, and total.
A labor section could look like this:
- Task: Install interior door
- Estimated labor: 3.5 hours
- Labor rate: $85 per hour
- Labor total: $297.50
Show the number of workers when crew size affects the price. Also include travel, setup, surface protection, cleanup, and disposal time when those activities are part of the job. If you use a flat rate for certain services, label the charge clearly and explain what it includes.
Do not base your rate on wages alone. Your labor price must account for payroll costs, insurance, tools, vehicles, office time, and other operating expenses. Bookipi’s estimating guidance recommends calculating labor from expected hours and rates while allowing room for unexpected job conditions.
List material quantities, costs, and markups
Create a separate materials section so the client can see what the project requires. Include each item’s description, quantity, unit cost, markup, and extended total. Use specific descriptions when brands, sizes, or product types affect the price. “Paint” is less useful than “one gallon of washable interior eggshell paint.”
Your material lines might include:
- Two interior door hinges at $14 each
- One tube of paintable caulk at $8
- Three lengths of primed pine trim at $22 each
- One gallon of interior paint at $46
Include delivery charges, rentals, specialty hardware, fasteners, protective materials, and expected waste when applicable. You can use allowances for items the client has not selected, but state what the allowance covers and how price differences will be handled.
Apply your material markup consistently, and keep it separate from your profit margin. Markup can cover purchasing time, sourcing, handling, storage, and price risk. Estimate Rocket advises using specific material lists because product and brand choices can change project costs significantly.
Calculate labor, material, fee, tax, and grand totals
Place the pricing summary after the itemized sections. Show the labor subtotal, materials subtotal, material markup, and any project-specific fees. List trip charges, disposal fees, equipment rentals, permit fees, and subcontractor costs separately rather than hiding them inside one vague line.
Then calculate applicable sales tax according to local requirements. Keeping tax separate helps the client understand how you reached the final price. Your summary might look like this:
- Labor subtotal: $850
- Materials subtotal: $340
- Material markup: $85
- Trip and disposal fees: $75
- Sales tax: $108
- Grand total: $1,458
If the project has uncertain conditions, identify any allowance or contingency and explain what it covers. Avoid adding an unexplained cushion to the total. Careful calculations matter because estimating mistakes can lead to cost overruns and lost profit, as Beck Technology explains.
Set deposit, payment, expiration, and change-order terms
State how much the client must pay before work begins and when the remaining balance is due. You might request a flat deposit, a percentage of the project total, or payment for special-order materials. Make sure your deposit practices follow applicable laws and explain whether the deposit is refundable.
List accepted payment methods, cancellation requirements, late-payment terms, and the estimate’s expiration date. An expiration date gives you a way to address changes in supplier pricing, product availability, or scheduling. For example: “This estimate is valid for 15 days. Material prices and availability may change after this date.”
Add a change-order process that requires written approval before extra work starts. Explain how you will price added labor and materials, who must approve the change, and whether the schedule will change. Include warranty terms, limitations, and client responsibilities. A complete estimate should also cover payment methods and terms, along with relevant disclaimers and liability information.
Add client acceptance, signature, and next steps
End the template with an approval section that clearly authorizes the project. Include a statement such as: “I approve the scope of work, pricing, terms, and payment schedule described in this estimate.” Add space for the client’s printed name, signature, approval date, and preferred start date.
You may also include a space for your signature if your process requires both parties to acknowledge the agreement. Digital approval, a signed PDF, or a written email may work for your business, but confirm that your method meets local contract requirements. Bookipi includes client signature and date fields as part of its recommended estimate format.
Finish with practical next steps. Tell the client how to approve the estimate, pay the deposit, select materials, and schedule the work. For example: “To accept, sign below and return this estimate by email. Once approval and the deposit are received, we will confirm the project start date.” Clear instructions reduce delays after the client agrees to move forward.
Check costs, markups, and margins before sending
Review every quantity, rate, formula, and total before sending the estimate. Confirm that labor hours match the actual scope and include travel, setup, protection, cleanup, and disposal time. Compare material quantities against your notes, photos, measurements, and current supplier pricing.
Then review your markup and margin. Make sure you have not confused material markup with profit margin, omitted overhead, or entered a discount without checking its effect on profit. Recheck taxes, fees, deposits, balance due, payment terms, and any allowances.
Finally, read the estimate from the client’s perspective. Can they tell exactly what you will do, what they will receive, and what is excluded? Look for vague language, inconsistent descriptions, missing assumptions, and unexplained charges. Beck Technology recommends reviewing estimates before finalizing them. Save the approved version so your scope, pricing, and terms remain documented throughout the job.
Where Can You Find and Compare Free Handyman Estimate Templates?
Free handyman estimate templates come in several formats, and the right choice depends on how you price work, serve clients, and manage job records. A basic document may be enough for a few straightforward projects. A spreadsheet offers more control over labor, material costs, markups, and totals. If you prepare estimates at job sites, mobile estimating software may save time and reduce duplicate data entry.
Compare more than the template’s appearance. Look for editable pricing fields, reliable formulas, branding options, client approval features, and secure storage. The template should show how you reached the price, make the scope easy to understand, and help your team follow the same process on every job.
Use Word and Google Docs templates
Word and Google Docs templates are a practical starting point for a handyman business that wants a professional estimate without adopting new software. You can add your logo, contact information, client details, scope of work, pricing, terms, and signature fields. Google Docs also makes it simple to share documents with your team and access them from different devices.
This format works well for straightforward repairs, installations, and maintenance projects. You can download a free handyman estimate template for Google Docs, customize the sections, and print or send the completed estimate by email.
The main limitation is calculation control. Word processors may not update totals automatically when rates or quantities change, so review every number before sending the estimate.
Use Excel and Google Sheets pricing templates
Excel and Google Sheets templates work well when a project includes several labor tasks, material quantities, or markup calculations. You can create columns for descriptions, quantities, unit costs, labor hours, rates, taxes, and line totals. Formulas can then update subtotals and the final price when you change an input.
Bookipi offers editable handyman estimate templates for repairs, installations, maintenance, and other odd jobs. You can also create separate tabs for supplier costs, standard labor rates, service packages, and frequently used materials.
Protect formula cells before sharing a spreadsheet with a client, and test it with a completed project. A spreadsheet only helps when the formulas are correct and the prices reflect your actual costs.
Download PDF and printable estimate forms
PDF and printable forms can help during an in-person consultation, property walkthrough, or project where a client prefers paper. You can complete a form by hand, save a digital copy, or customize it before printing. A consistent layout also makes your estimates easier to review.
You can download, print, and customize handyman estimate forms for different project types. Keep separate sections for the scope, labor, materials, fees, taxes, estimated total, payment terms, and client approval.
Paper forms require an organized filing process. After the client signs, scan or photograph the document and save it with the project records. Send the client a copy as well, so both parties have the same version of the approved estimate.
Choose mobile-friendly estimating software
Mobile estimating software lets you prepare and send an estimate while you are still at the property. You can record measurements, select services, add materials, and deliver a professional document from your phone or tablet. This avoids writing notes in one place and rebuilding the estimate later.
Some tools combine estimates with quotes, invoices, and receipts. Bookipi supports creating and sending estimates digitally, which can shorten the time between a site visit and client approval. Look for customer records, project history, reusable services, attachments, and electronic approvals.
Before choosing a platform, check offline access, payment collection, export options, and storage limits. Select software that fits your current workflow and gives you room to standardize your process as your team grows.
Compare formulas, customization, branding, approvals, and storage
A polished template can still create problems if it does not calculate labor, materials, fees, taxes, and discounts correctly. Look for a clear breakdown that shows clients how the price was determined. Granular project costs also make it easier to review your own pricing before sending an estimate.
Check whether you can customize the logo, colors, service categories, terms, and pricing rules. Then review the approval process. Can the client sign electronically? Do you receive a notification? Can you find the approved version later?
Storage is especially important when several people prepare estimates. Use a shared folder or estimating system with consistent file names, and avoid keeping the only copy on one person’s device.
Check for labor, material, tax, fee, and terms fields
Before using a free template, confirm that it includes the costs your business commonly encounters. At a minimum, look for business and customer details, service descriptions, labor hours and rates, material costs, additional fees, taxes or discounts, and the final estimated total. A professional handyman estimate template should make this information easy to enter and easy for the client to understand.
Also check for trip charges, disposal, permits, equipment rentals, deposits, payment terms, expiration dates, exclusions, and change orders. You may not use every field on every job, but having them available keeps important terms out of scattered emails and handwritten notes.
Test the template with a completed project before making it your standard. Confirm the calculations, review the scope, and make sure the final document reflects how your business actually prices work.
How Can You Customize a Free Handyman Estimate Template?
A free handyman estimate template is a helpful starting point, but it should reflect the way your business prices and delivers work. A generic form may include fields for labor and materials, yet it will not know your service area, minimum charge, preferred payment terms, or the job costs that affect your margins.
Customize the template before sending it to a client, then save separate versions for your most common services. A professional estimate should include your business information, relevant certifications, clear pricing, payment terms, and project details. This handyman estimate template guide offers a useful reference for the information clients expect to see.
Add your logo, license details, contact information, and service area
Start with a branded header that includes your business name, logo, phone number, email address, website, and business address. Add your license number, trade certifications, and insurance information when they apply to your work. These details help clients confirm they are hiring an established professional and give them an easy way to reach you with questions.
Include the client’s name, phone number, email address, and service address below your business information. Your service area also deserves a place on the template. List the cities, neighborhoods, or ZIP codes you serve, then explain whether travel charges apply outside that area. If you work across multiple locations, identify the branch or technician assigned to the project.
Create categories for repairs, installations, maintenance, and renovations
Organize your template around the services you sell most often. Useful categories may include repairs, installations, maintenance, renovations, exterior work, carpentry, drywall, painting, and assembly. Grouping services this way helps you find the right pricing rules quickly and gives clients a clearer view of what the estimate covers.
Create a separate template for each high-volume job type when the labor, materials, or process varies significantly. A drywall repair estimate, for example, may need fields for patch size, texture matching, primer, and paint. An installation estimate may need fields for mounting hardware, surface protection, testing, and removal of existing equipment. Templates can support many repair, installation, maintenance, and odd-job estimates, but each one should leave room for job-specific details.
Set hourly rates, minimum charges, trip fees, and pricing rules
Add your standard hourly rate, but do not rely on it as your only pricing rule. Include a minimum service charge for small jobs, along with trip fees, after-hours rates, emergency pricing, and charges for additional technicians. State whether your rate covers setup and cleanup or whether those activities appear as separate line items.
You can also create rules for billing partial hours. For example, you might bill in 15-minute, 30-minute, or one-hour increments after the minimum charge. Keep these rules visible so the client understands how you calculated the total. Labor pricing should reflect the expected hours and applicable rates, not a rough guess. Review your handyman pricing and estimating systems regularly to make sure they support healthy margins.
Define material markups, allowances, waste factors, and suppliers
Your materials section should show what you expect to purchase and how those costs contribute to the final price. Add fields for the item description, quantity, unit cost, markup, and line total. If the client has not selected a fixture, finish, or hardware, use an allowance and explain what happens if the final purchase costs more or less than that amount.
Include waste factors for materials such as lumber, drywall, flooring, tile, and paint. Add delivery, pickup, rental, and supplier fees when they apply. Keep a current list of preferred suppliers and typical costs so your estimates begin with realistic numbers. Using vendor purchases or quotes, rather than outdated spreadsheet assumptions, can make material pricing more reliable, as Estimate Rocket explains.
Set deposits, cancellations, delays, payment methods, and warranty terms
Use your template to explain what the client owes and when payment is due. Add the deposit percentage or fixed amount, progress payment milestones, final balance, accepted payment methods, and any late-payment terms. If you collect a deposit before ordering materials, state that clearly and explain whether it is refundable.
Your terms should also address cancellations, client-caused delays, access problems, weather, hidden conditions, and material shortages. Add a warranty statement that defines what your workmanship warranty covers, how long it lasts, and what it excludes. Include liability language where appropriate, but have an attorney review your terms if you need a legally binding contract. Clear terms reduce confusion before work begins.
Create reusable templates for common services
Save separate templates for jobs you estimate repeatedly, such as door repairs, TV mounting, faucet replacement, drywall patching, deck repairs, painting, and rental property maintenance. Preload the usual labor tasks, material categories, production assumptions, fees, and terms. This reduces repetitive data entry and keeps your estimates consistent across similar projects.
Do not make the template so rigid that it encourages inaccurate pricing. Leave fields for measurements, site conditions, photos, access notes, and client selections. A reusable template should speed up your process, not replace your judgment. Edit each version for the specific property before sending it to the client. An editable handyman estimate template can help you organize project details and prepare a professional final document.
Update rates and assumptions with completed-job data
Treat every completed project as useful estimating information. Compare the estimated labor hours with the actual time worked. Review material receipts, travel time, disposal costs, change orders, callbacks, and final gross margin. If a task regularly takes longer than your template allows, update the labor assumption instead of accepting the loss on every similar job.
Review your templates on a regular schedule and after major changes in supplier pricing, wages, fuel costs, or service area. Rechecking an estimate before sending it can catch missing quantities, incorrect rates, and formula errors. Beck Technology’s estimating guidance also emphasizes reviewing estimates before finalizing them. Over time, completed-job data will give you more reliable production rates and pricing rules, which can support the repeatable systems offered through TradeworX Consulting’s handyman business coaching.
How Do You Calculate Labor, Materials, Markups, and Total Pricing?
A profitable handyman estimate starts with the full cost of delivering the job, not just the visible repair. Your price must account for productive labor, travel, materials, business expenses, job-related risks, and the profit your company needs to remain healthy. If you only charge for the time spent holding a tool, unpaid work can quietly reduce or eliminate your profit.
Use the same estimating process for every project. Start with the scope, break the work into tasks, calculate labor and material costs, add fees and markups, then review the final price against your target margin. This consistency helps you compare estimated hours and costs with actual job results.
Your rates should come from your business data, not a competitor’s price or a guess. Track labor hours, material spending, callbacks, and unexpected costs after each project. A handyman estimating guide can help you organize these details, while your own completed-job data should guide your final pricing decisions.
Estimate labor by task, production rate, and crew size
Break the project into individual tasks instead of estimating one large block of time. A bathroom repair, for example, may include removing damaged material, preparing the surface, installing a replacement, sealing the area, and cleaning up. Estimate the hours for each task, then add them together.
Use your production rate, or the amount of work a technician or crew can complete in a set period, to make estimates more consistent. Adjust the expected time for job complexity, technician experience, material type, and property condition.
Remember that crew hours and clock hours are different. If two technicians work for four hours, the project uses eight labor hours. Compare estimated hours with actual hours after each job, then update your production assumptions when you find a pattern.
Include travel, setup, protection, cleanup, disposal, and admin time
The workday begins before the repair and ends after the property is ready for the client. Include driving, loading tools, collecting materials, parking, carrying equipment, protecting floors and furniture, setup, cleanup, and disposal. These activities may not appear in the finished work, but they still use paid labor and vehicle capacity.
Include project-related administrative time as well. This may cover site visits, measurements, supplier calls, material research, scheduling, client communication, and estimate preparation. You can include these costs in your labor calculation or apply a clearly defined trip, service, or diagnostic fee.
For unfamiliar work, document the risks that may affect the schedule. Difficult access, occupied spaces, or uncertain wall conditions may justify a contingency or a time-and-materials provision.
Calculate burdened labor costs, not wages alone
An employee’s wage represents only part of your labor cost. Burdened labor also includes payroll taxes, workers’ compensation, benefits, paid time off, training, uniforms, tools, insurance, and other expenses connected to employing and supporting your team.
Calculate the annual cost of employing a technician, then divide it by realistic billable hours. Do not divide by every hour on the calendar. Training, meetings, maintenance, travel between jobs, sales activity, and slow periods reduce the hours you can actually sell.
For example, if an employee costs your business $70,000 per year and produces 1,400 billable hours, the labor cost is $50 per billable hour before overhead and profit. Add overhead and your target profit separately. This method gives you a rate based on what the business must earn, not just what the employee takes home.
Build a material takeoff with quantities, waste, delivery, and rentals
A material takeoff lists everything required to complete the stated scope. Include each product, size, quantity, unit cost, supplier, and expected usage. Do not overlook consumables such as fasteners, adhesive, caulk, primer, blades, sandpaper, drop cloths, and fuel.
Add waste based on the material and installation method. Flooring, trim, drywall, tile, and lumber may require extra material for cuts, defects, or pattern matching. Include delivery charges, supplier pickup time, rental equipment, special-order fees, and minimum order requirements.
Connect the takeoff to the scope so changes are easy to track. If the client selects a different material, update the cost and labor assumptions together. A written material takeoff can help reduce missed items and simplify purchasing on larger projects.
Separate overhead, material markup, profit margin, and sales tax
These pricing components have different purposes. Overhead covers expenses such as vehicles, rent, software, phones, insurance, marketing, office support, and management. Material markup can cover procurement time, handling, warranty risk, and the cost of carrying materials. Profit is what remains after the business pays its expenses.
Markup and margin are not interchangeable. A 25% markup on a $100 material cost creates a $125 selling price. A 25% gross margin requires a $133.33 selling price because the profit must equal 25% of the final selling price. Confusing the two can leave your estimates below target.
Handle sales tax according to the rules for your location and the type of work or materials sold. Show tax separately when appropriate, and confirm requirements with your state revenue department or tax professional. Make it clear which amounts are business revenue and which are collected for tax.
Add permits, subcontractors, equipment, access issues, and site conditions
Review the property and scope for costs that are easy to miss. Permits, inspections, subcontractors, equipment rentals, specialty tools, parking, long carries, stairs, restricted work hours, and occupied spaces can all affect your price. Include these costs or state clearly that they are excluded.
Pay close attention to conditions that may remain hidden until work begins. Water damage, uneven surfaces, outdated wiring, concealed plumbing, and structural problems can change the scope after removal or demolition. List the assumptions behind your estimate and explain how unknown work will be handled.
When another trade is required, request a written subcontractor quote and confirm what it includes. Add time for scheduling, coordination, supervision, and quality checks. Reviewing common estimating mistakes can help you identify overlooked site and project costs.
Choose fixed-price or time-and-materials estimates
A fixed-price estimate gives the client one price for a clearly defined scope. It works well when the tasks, materials, and site conditions are reasonably predictable. Protect your business by listing assumptions, exclusions, deliverables, and the process for approving additional work.
Time-and-materials pricing charges for the labor and materials actually used. It can suit troubleshooting, diagnostic work, and repairs with unknown conditions. State the hourly rate, material markup, service fees, and any spending limit that requires client approval. Tell the client how you will provide updates if the work takes longer than expected.
A hybrid estimate can combine both methods. Use fixed prices for clearly defined repairs, then apply time-and-materials terms to concealed damage, troubleshooting, or client-requested changes. TradeworX Consulting’s Hybrid Estimating approach helps handyman businesses create consistent prices while accounting for uncertainty in repair work.
Check formulas, rounding, subtotals, and final totals
Review every estimate before sending it. Confirm that each quantity is multiplied by the correct rate, labor hours match the scope, material subtotals include waste, and fees appear only once. Check that discounts, deposits, sales tax, and the remaining balance use the correct base amount.
Round prices consistently, but avoid rounding individual line items in a way that creates unexplained differences. Compare the detailed line items with the final total, then review expected gross profit dollars and margin. If the result falls below your target, correct the estimate before presenting it.
A second review is especially useful when an estimate includes multiple technicians, subcontractors, allowances, or tax rules. Save the approved version and record actual hours, materials, and unexpected costs after the job. That information will improve your production rates and make future estimates more reliable.
How Can You Create Client-Ready Handyman Estimates?
A client-ready handyman estimate does more than list a total price. It shows the customer what you plan to do, how you calculated the cost, and what to expect before work begins. A detailed estimate also helps you account for labor, materials, travel, fees, and job conditions that can affect your profit.
Treat the estimate as the first step in a professional client experience. Use plain language, organize the information logically, and make the approval process simple. When customers understand the scope and price, they are more likely to feel confident moving forward. Your team also has a clear reference for completing the work.
A repeatable estimating process makes this easier. TradeworX Consulting’s handyman business coaching and growth systems can help owners create estimating practices that support accurate pricing and consistent operations.
Describe every line item in plain language
Write each task so the customer can understand exactly what they are paying for. Avoid vague descriptions such as “repair wall” or “install hardware.” Instead, describe the specific work, location, quantity, and finish. For example, “Patch three nail holes in the hallway wall, sand smooth, prime, and apply one matching coat of paint” gives the customer a much clearer picture.
Break larger projects into separate line items for labor and materials when practical. This makes the estimate easier to review and helps you identify missing costs before sending it. Detailed descriptions also help customers and contractors understand how the price was determined, as explained in this guide to common estimating mistakes.
Use consistent wording across similar jobs. Standard descriptions make estimates faster to prepare and easier for technicians to follow in the field.
Explain allowances, unknown conditions, exclusions, and client responsibilities
Some project details cannot be confirmed until work begins. If the customer has not selected a faucet, tile, paint color, or other finish, include an allowance. State the amount included and explain what happens if the final selection costs more or less.
Identify unknown conditions, such as hidden water damage, deteriorated framing, unsafe wiring, or concealed plumbing problems. Explain that these conditions may require additional work and written pricing approval. Then list exclusions clearly. An estimate for drywall repair, for example, might exclude full-room painting, mold remediation, or electrical repairs.
Include client responsibilities as well. These may include clearing furniture, providing access, selecting materials by a deadline, or securing building approval. A clear scope of work should explain what is included and what is not included, so everyone understands their role before the project starts.
State the validity period and possible pricing changes
Add an expiration date to every estimate. A 15-day or 30-day validity period gives the customer time to decide while protecting you from outdated supplier pricing, labor rates, or scheduling conditions. Place the date near the total so it is easy to find.
Explain what may change after the estimate expires. Material costs, delivery charges, permit fees, and subcontractor pricing can shift. If the customer approves the estimate after the expiration date, state that you may need to confirm pricing and availability before scheduling the work.
Avoid language that gives you unlimited discretion. Be specific about the circumstances that could require an update. For example: “This estimate is valid for 30 days. Material pricing and availability will be confirmed when the project is scheduled.” Adding an estimate expiration date to your template makes this part of your regular process.
Clarify deposits, payment milestones, methods, and balance due
Your estimate should explain when payment is due and how the customer can pay. Include the deposit amount, progress-payment milestones, accepted payment methods, and final balance. For a small repair, you might require payment upon completion. A larger renovation may call for a deposit, a payment when materials arrive, and a final payment after the walkthrough.
State whether the deposit is refundable, when materials will be ordered, and whether scheduling begins only after payment is received. If you charge a service call, trip fee, card-processing fee, or late-payment fee, list it before the customer approves the estimate.
Use specific amounts and dates instead of phrases such as “payment due in stages.” The customer should be able to see exactly how much is due, when it is due, and which payment options you accept. Payment terms and accepted methods belong in the written estimate, not only in a verbal conversation.
Get approval before starting change-order work
A change order covers work that was not included in the original estimate. It might involve repairing hidden damage, adding another room, switching to a more expensive material, or completing a task the customer mentions after work begins.
When added work changes the price, prepare a short change order before starting. Describe the additional task, added labor and materials, revised total, and effect on the schedule or payment plan. Ask the customer to approve it in writing, even if the adjustment seems straightforward.
For a small handyman job, a written text or email approval may be sufficient, depending on your agreement and local requirements. Larger projects may call for a signed estimate or contract. Handyman Startup’s estimate guidance notes that formal approval becomes especially important when the scope or price is substantial. Keep the original estimate and each approved change order together in the project record.
Send the estimate by email, PDF, or client portal
Send the completed estimate in a format the customer can easily open, review, and save. Email works well for many jobs, while a PDF preserves your branding, formatting, and terms. If you use estimating software, a client portal can make approval, payment, document storage, and follow-up easier.
Before sending, confirm that the document includes your business name, contact information, license details where applicable, estimate number, issue date, scope, pricing, terms, and approval instructions. Name the file clearly, such as Smith-Bathroom-Repair-Estimate-1042.pdf.
Use the email to summarize the next step. Tell the customer how to approve the estimate, whether a deposit is required, and how long the pricing remains valid. A formal written estimate sent by email gives the customer something to review and creates a dependable record for your business.
Review the scope and price with the client
Do not assume the customer will interpret the estimate exactly as you intended. Offer to review the scope and price by phone, video call, or in person. Walk through the major tasks, materials, assumptions, exclusions, schedule, and payment terms.
Pay attention to questions that reveal a scope gap. If the customer asks whether patching includes painting, whether furniture will be moved, or whether a fixture is included, update the estimate if necessary. Clarifying the work before approval is much easier than resolving a disagreement after the project starts.
Use the review to explain the value included in the price, rather than defending every individual number. Point out the planning, surface protection, cleanup, materials, and workmanship included in the estimate. Clear communication before, during, and after the job often matters as much as the paperwork, so use a complete written estimate to support a real conversation.
Follow up and save written approval
Follow up after sending the estimate to confirm that the customer received it. A simple message can ask whether they have questions and remind them of the expiration date. If you do not receive a response, set a reasonable follow-up schedule instead of sending repeated messages every day.
When the customer approves, save that approval with the estimate. Keep the signed document, approval email, text message, deposit receipt, and change orders in one project folder. Your records should show which version the customer accepted and when the approval occurred.
Written approval protects both parties and gives your team a reliable reference during the job. It also helps you review completed projects later. Compare estimated hours, material costs, and final results to make future estimates more accurate. Following up confirms receipt and gives you a chance to answer questions before work begins, a practice also recommended in this guide to avoiding estimating mistakes.
Which Handyman Estimate Template Mistakes Hurt Accuracy and Profit?
A free handyman estimate template can make quoting faster, but it cannot make pricing accurate on its own. The result still depends on the details you enter, the assumptions you make, and the costs you remember to include. A missed labor hour or forgotten disposal fee may seem minor on one job, but repeated omissions can quietly reduce your gross profit across every project.
Use your template as part of a repeatable pricing process, not just as a document you send to customers. It should help you capture the complete scope, estimate production time, account for overhead, explain the price, and document what the customer approved.
Before sending an estimate, compare the scope with your site notes. Check that every task has a labor allowance, every material has a current cost, and every fee has a clear explanation. Then review the final price against your target margin and the time your team has available to complete the work.
The most common mistakes are easy to overlook because they often happen before the estimate reaches the customer. A consistent review process gives you a chance to correct them while the job is still profitable and the scope is still easy to clarify.
Write specific scope descriptions and update price lists
Vague descriptions create confusion for you and the customer. “Repair drywall” does not explain how many holes you will patch, whether texture and paint are included, or what condition the wall must be in before work begins. A stronger description identifies the task, location, quantity, materials, finish, and limits of the work.
Write each line item so another technician could understand what is expected. Instead of “install shelves,” try “install two customer-provided floating shelves on the living room wall, including layout, anchoring, and cleanup.” Specific details make the job easier to price and help customers see how the total was calculated. Clear scope descriptions also reduce disagreements after work begins.
Review labor rates, supplier prices, minimum charges, and service fees regularly. An estimate built on outdated costs may look polished but still leave you paying for the difference.
Account for labor, travel, setup, and cleanup
One of the most costly estimating mistakes is counting only the time spent actively repairing or installing something. A two-hour job may require another hour for loading materials, driving, shopping, protecting the work area, setting up tools, documenting the work, and cleaning up. If those activities are missing, the estimate understates the labor required.
Break each project into individual tasks and estimate the time for each one. Include preparation, customer communication, travel, material pickup, setup, protection, installation or repair, inspection, cleanup, and disposal. The handyman estimating process should account for the complete job, not only the work performed inside the property.
You can recover these costs through your hourly rate, a trip charge, a service fee, or separate line items. Choose an approach that fits your business and use it consistently. Comparing estimated hours with actual hours will show which services regularly take longer than expected.
Include waste, delivery, taxes, permits, disposal, and equipment
Materials rarely cost only the amount shown on a supplier receipt. Your estimate may also need to cover waste, delivery, sales tax, equipment rentals, permits, disposal, parking, and special access requirements. A few overlooked charges can consume the margin you expected to earn from the project.
Add quantities, unit costs, waste allowances, and applicable taxes to the materials section. Then review the job for indirect costs. Will you need a trailer, specialty tool, dump run, lift, parking permit, or extra protection for the customer’s property? These costs belong in the estimate before the customer approves the work. Indirect costs are easy to miss, but they affect profitability before the project starts.
Use an allowance when the final cost is uncertain, such as disposal or customer-selected fixtures. Explain what the allowance covers and how you will handle any difference between the allowance and the actual cost.
Distinguish material markup from profit margin
Material markup and profit margin are related, but they are not the same. Markup is the amount added to your material cost to determine the customer price. Margin is the portion of that selling price left after the direct material cost is removed. Confusing the two can make a job appear more profitable than it really is.
For example, adding 25% to a $100 material cost produces a $125 selling price. The gross profit is $25, but that equals 20% of the selling price, not 25%. The difference becomes more significant when material costs are high or when several jobs use the same pricing shortcut.
Set a material pricing rule in your template and apply it consistently. Start with supplier quotes or recent purchase costs, then account for waste and your target material gross profit. This estimating guidance explains why material pricing should reflect both cost and expected waste. Keep material markup separate from labor, overhead, and sales tax so you can see what each part contributes.
Add assumptions, exclusions, change orders, and payment terms
Every estimate contains assumptions, whether you write them down or not. You may assume a wall is accessible, existing hardware can be removed, an electrical circuit is adequate, or the customer will provide a specific item. If an assumption is wrong, your original price may no longer cover the work.
Add an assumptions and exclusions section to your template. State what the price includes, what it does not include, and which conditions could require a revised estimate. Possible exclusions include structural repairs, concealed water damage, code upgrades, painting beyond the listed area, and customer-requested design changes.
Explain how change orders work before the customer approves the estimate. Require written approval before performing work outside the original scope, and state whether additional work is billed hourly, at a new fixed price, or through an updated estimate. Include deposits, payment milestones, cancellations, late payments, and final payment terms. A careful estimate review process can catch unclear assumptions before they create a dispute.
Check formulas, quantities, and totals
A professional template can still produce a wrong price if one quantity, rate, or formula is incorrect. Check every line item before sending the estimate. Confirm that labor hours multiply by the correct rate, material quantities match the scope, markups apply to the intended costs, and taxes are calculated correctly.
Review subtotals separately for labor, materials, fees, and taxes. Then compare the final total with your site notes, supplier quotes, and expected production time. Watch for copied formulas that stop one row early, duplicate materials, incorrect tax treatment, or a discount applied to the wrong subtotal.
Use a second review when the job is complex or the price is unusually high. Even a quick read by another team member can catch an omitted task or an extra zero. Estimating errors can lead to lost work, cost overruns, and lower profitability, so a short review is worth the time.
Send a complete, branded estimate
A bare total sent by text gives the customer very little context. It also makes your business look less organized and leaves you with a weak record of what was offered. A client-ready estimate should include your business name, logo, contact information, customer details, property address, estimate number, issue date, and expiration date.
Include the scope, labor, materials, fees, taxes, schedule, payment terms, exclusions, warranty details, and change-order process. Use clear headings and separate subtotals so customers can review the price without searching through a block of text. A complete handyman estimate template provides a helpful checklist for the information customers typically need before approving a project.
Make sure your phone number, license or certification details, service area, and payment instructions are current. Save a PDF copy of every estimate you send, along with the approved version. This creates a reliable project record and makes future follow-up easier.
Discuss the estimate and follow up
Sending an estimate is not the same as explaining it. Customers may hesitate because they do not understand a line item, see a fee they did not expect, or wonder whether a specific task is included. A short phone call or walk-through can answer those questions before they become objections.
Explain what your team will do, what the customer needs to provide, which conditions could change the price, and when payment is due. Be direct about unknown work. If you included an allowance or contingency, explain how it will be applied and when you will confirm the final cost.
Follow up after sending the estimate, then record the customer’s questions and approval in writing. If the customer requests a change, update the estimate or create a change order instead of relying on a verbal agreement. Clear communication supports a smoother sales process and gives you useful information for improving future estimates and operating systems through TradeworX Consulting.
When Does a Free Template Need Hybrid Estimating and Growth Systems?
A free handyman estimate template is useful when you manage a small number of similar jobs and personally review every quote. It gives you a consistent starting point for listing labor, materials, fees, payment terms, and the final price. But as your business takes on more work, adds technicians, or serves multiple areas, a basic template can become difficult to manage.
The warning signs are usually easy to spot: estimates take too long to prepare, technicians price similar jobs differently, approved work regularly falls below your target margin, or you cannot explain why a job was profitable or unprofitable. These problems are rarely caused by the template alone. They point to a gap between estimating and the larger systems that support sales, scheduling, production, and financial tracking.
Hybrid estimating addresses that gap by combining standardized pricing rules with professional judgment. You can create a dependable process for common work while still accounting for access issues, hidden conditions, unusual materials, and customer-specific requirements. When that process connects to revenue and growth systems, each estimate becomes more than a quote. It becomes useful data for running a stronger business.
Recognize when a basic template limits your workload
A template starts to limit your workload when you spend more time rebuilding estimates than reviewing the work itself. Re-entering prices, correcting formulas, and adjusting line items for every customer can slow down your response time. It also creates more opportunities for missed materials, incorrect labor hours, or charges that never make it onto the final estimate.
Look for repeated problems. Are you adding travel, setup, cleanup, disposal, or administrative time manually? Do technicians use different rates for the same task? Are customers asking why the price changed after approval? A basic form can hide the true cost of a project from the person preparing the estimate. A granular estimate, on the other hand, makes the pricing logic easier to review, as estimating experts explain.
When these issues appear often, update the process behind the template. Add required fields, preset pricing rules, approval steps, and a method for comparing estimated costs with actual job results.
Standardize estimates across technicians, services, and locations
Consistency matters as soon as someone besides the owner prepares an estimate. Every technician should work from the same labor assumptions, material markups, minimum charges, and policies for uncertain conditions. Otherwise, the same service may receive a different price based on who visits the property, which can create confusion for customers and uneven margins for the business.
Start with a central service catalog. For each common repair or installation, document the expected labor time, materials, equipment, minimum charge, and pricing range. Then define when a technician can adjust the standard estimate, such as when access is restricted or additional prep work is necessary. This keeps judgment in the process without allowing every quote to become a completely new calculation.
Before sending an estimate, require a quick review of the scope, quantities, assumptions, and exclusions. Reviewing calculations and assumptions helps maintain consistency across technicians and services, as construction estimating guidance recommends.
Track close rates, average ticket size, labor efficiency, and gross margin
An estimate should help you understand the health of your sales and production process, not just the price of one job. Track your close rate by service, average ticket size, estimated versus actual labor hours, material variance, and gross margin. Review these figures by technician, job type, lead source, and location when possible.
The patterns can reveal problems that a completed invoice will not show. A high close rate with weak margins may indicate that your prices are too low or that labor assumptions are unrealistic. A strong gross margin with a low close rate may point to slow follow-up, unclear scope descriptions, or prices that do not match customer expectations. If actual labor consistently exceeds the estimate, your production times may need to be updated.
Create a simple weekly or monthly review. Compare what you estimated, what you sold, and what the job actually required. Tracking metrics such as close rates and gross margins can help you make better estimating decisions, according to contractor estimating guidance.
Connect estimating data to repeatable revenue systems
Your estimate should carry accurate information into every stage of the job. When a customer approves the quote, the accepted scope should guide scheduling, purchasing, crew instructions, job costing, invoicing, and follow-up. If your team has to retype the same details several times, errors become more likely and valuable time gets lost.
A connected process also helps you identify repeatable services. If customers frequently request the same deck repair, drywall patch, fixture installation, or rental property maintenance task, use completed-job data to create a service package. Add standard labor assumptions, materials, pricing rules, and follow-up prompts to the package. Your team can then prepare similar estimates faster while maintaining a consistent customer experience.
Review estimate data alongside sales and financial results. This can reveal which services generate reliable margins, which lead sources produce qualified customers, and where customers commonly reject quotes. Connecting estimating data to repeatable revenue systems helps reduce manual entry and supports better decisions based on actual job performance, as estimating research notes.
Apply TradeworX Consulting’s Hybrid Estimating approach
Hybrid Estimating combines standard pricing rules with the judgment required for real job conditions. A fixed template may be enough for a straightforward faucet replacement, but it can fall short when a property has difficult access, hidden damage, unusual finish requirements, or several possible solutions.
With a hybrid approach, you standardize the parts that should remain consistent. These may include labor rates, common materials, markups, minimum charges, trip fees, and typical production times. You then create a clear method for handling variables, including site conditions, special-order materials, additional crew members, disposal requirements, and customer-requested options.
The result is a process that is structured without being inflexible. Technicians can assess the work in front of them while following clear rules for documenting and pricing exceptions. Owners can review estimates with greater confidence because the quote shows both the standard calculation and the reason for any adjustment. This approach reflects estimating guidance on adapting templates to the complexity of each project.
Use Revenue Engine and Growth Accelerator for sustainable growth
Reliable estimates protect individual jobs, but long-term growth requires systems that support the full customer and employee experience. Your business needs a consistent path from lead intake to estimate, approval, scheduling, production, payment, review, and repeat work. Without that structure, additional sales can create delays, rework, and pressure on your margins.
TradeworX Consulting’s Revenue Engine and Growth Accelerator services help handyman business owners build those connected systems. Revenue Engine focuses on the path from opportunity to collected revenue, including the steps that help your team respond, sell, schedule, and follow up consistently. Growth Accelerator supports the broader operating structure behind hiring, service delivery, marketing, accountability, and performance review.
Use your estimating data to guide both systems. If a service sells well but takes longer than expected, revisit the labor assumptions. If a technician has a strong close rate but inconsistent margins, review pricing and production practices. If qualified leads are being lost before an estimate is approved, examine the follow-up process. A correct estimate protects one project, while connected systems help your business make profitable decisions repeatedly. Houzz’s estimating guidance also points to the risk of a single incorrect estimate creating a loss, which makes reliable data and repeatable processes important as your company grows.
Related Articles
- Handyman Estimate Template Guide
- Handyman Estimate: How to Price Jobs Accurately
- 6 Common Estimating Mistakes and How Contractors Can Avoid Them
- Most Common Construction Estimating Mistakes and How to Fix Them
- 8 Common Construction Estimating Mistakes and How to Avoid Them
Frequently Asked Questions
What is a free handyman estimate template?
A free handyman estimate template is a reusable document for presenting project details, labor, materials, fees, taxes, payment terms, and the expected total. You can customize it with your branding and save versions for common services, such as drywall repairs, installations, painting, and maintenance work.
Is a handyman estimate the same as a quote or invoice?
No. An estimate gives the customer an expected project cost before work begins, while a quote usually presents a more formal price for a defined scope. An invoice is sent after work has been completed, or when a payment milestone is due, to request payment.
How can I make a free estimate template more accurate?
Include every task required to complete the job, including travel, setup, protection, cleanup, disposal, administrative time, and material pickup. Check labor hours, material quantities, markups, taxes, and fees before sending the document. Comparing estimated costs with actual job results will also help you update your pricing assumptions.
Should I use a Word document, spreadsheet, PDF, or estimating software?
Choose the format that matches your workload. Word or Google Docs can work well for simple projects, spreadsheets are helpful for detailed calculations, and mobile estimating software can make field estimates and digital approvals easier. As your team grows, choose a system that supports shared records, consistent pricing, approvals, and connections to scheduling and invoicing.
When should I move beyond a basic estimate template?
Consider a more structured estimating system when different technicians price the same work inconsistently, estimates take too long to prepare, margins are unpredictable, or your business is handling more jobs than you can easily track. TradeworX Consulting’s Hybrid Estimating, Revenue Engine, and Growth Accelerator services help handyman business owners connect pricing with sales, operations, and growth systems.